KAiZEN eSign is a powerful and intuitive chrome extension designed to revolutionise the way you sign documents electronically. With just a few clicks, you can effortlessly add your digital signature to any PDF or document, saving you time and effort. With KAiZEN eSign, you can sign documents from anywhere, anytime, on any device.
.png)
KAiZEN offers multiple features to make eSigning easy and efficient, including:
Ability to send eSign request to multiple signers in single request.
Ability to sign documents in multiple ways like manual draw, upload sign, auto-generate with name initials.
The final eSign document has secure and verified signature with certificate attached to it.
A user-friendly interface that is easy to use.
The ability to add text, dates, and other annotations to documents.
The ability to securely store your signed documents.
Step-by-Step guide on how to use KAiZEN eSign Chrome Extension:
Step 1. Install/Upgrade the KAiZEN eSign Chrome extension (Skip this step and jump to step 2, if the extension is already added to the browser)
Open Chrome Web Store: Go to the Chrome Web Store in Chrome browser.
Search for KAiZEN eSign: Search for "KAiZEN eSign" in the search bar.

Install the Extension: Click on the "Add to Chrome" button to add the extension to the browser
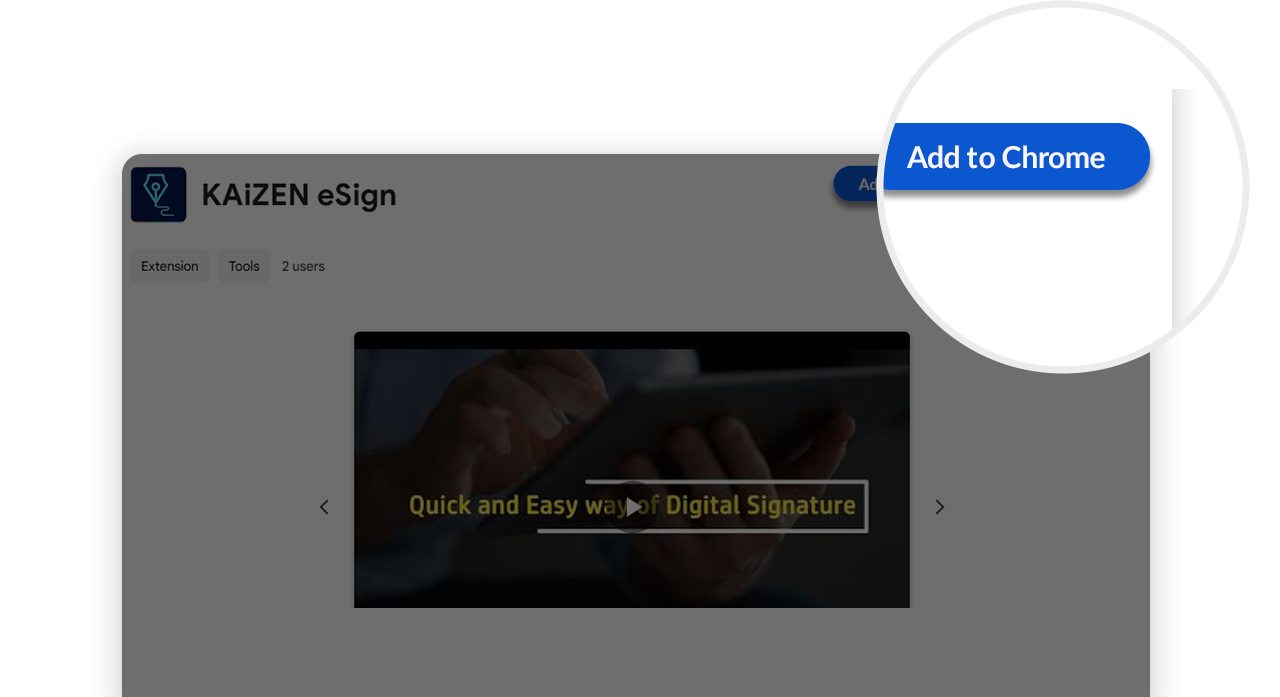
Once added to the browser, click on pin icon to add the extension on the extension bar.


Step 2. After adding the extension to the browser, a quick step is to configure the KAiZEN account details (Skip this step and jump to step 3, if the KAiZEN account is already configured inside the extension)
Add Account Details : Go to settings tab and add the KAiZEN account details received from KAiZEN team (i.e; Name with Access Token)
(Note: If you don't have an access token, please reach out to support at support@ayansoftwares.com for further assistance)

Remove Account Details: Simply click on the delete icon, next to Access Token Field

Step 3. How to Generate an eSign Request
Open the extension window: Click on the KAiZEN eSign icon in the chrome extension toolbar.

Select Your Account: Click on the "Select Your Account" dropdown under the "Generate Request" section and select your desired kaizen account from the list.

Fill Requestor Details: Enter the name, email and mobile number in the provided fields of the person who is raising the request for eSign.

Choose File: User can choose any of the below options to choose the file
Option 1: Drag and Drop: Drag and drop the PDF file you want to sign
Option 2: Choose File: Click the "Choose File" button to select the PDF file from your device.

Step 4. Define Signer(s) / Reviewer(s) details
User can enter details for multiple signers /reviewers in this section. For each user, enter their name, email and mobile number.
Signer: a person who will actually sign the document electronically.
Reviewer: a person who will just review the document electronically and will not sign.
Click the "+” button above the table to add one or more signers /reviewers.

For eg: If there are users (Mohit, Priya and Alex) as defined in the above example, then sign request will go to "Mohit" as a first signer. Once it is signed by Mohit, it will go to "Priya" as a reviewer. Once "Priya" reviews the request, it will go to "Alex" as a final third signer.
Step 5. Do you want to self sign the document?

KAiZEN extension has four buttons. Let’s understand the different actions you can do in this extension

a. Send for eSignature:
Review all the details (including requestor and signer information) and click the "Send for eSignature" button to send the file to the specified users in the same order as defined in the signer section.
b. Generate URL:
Use this button to quickly generate the eSigning request URL and share it via Email or directly send it by any other platform for anyone to sign it.
c. Add Tags:
Use this button to quickly add the different type of tags like "text", "date",etc on the PDF document.
On the pdf document, wherever user will add the tags, the signers will have to mandatory fills the information at those tag places.
d. Reset:
User can use the "Reset" button to clear all the filled information in the above form
By following these steps, you can efficiently use the KAiZEN eSign Chrome Plugin to streamline your electronic signature workflows.
No comments:
Post a Comment